

In helping our son’s high school theatre company, Janet and I identified the need and challenge of organizing the costumes. Before starting the organization project, I researched online and found nothing close to a solution for our challenge, so I am writing this to help others.
(Note that I wrote a follow-up blog about our experiences in Organizing a High School Theatre’s Wardrobe – Part 2.)
Our challenges:
- Organize costumes so that:
– the costumes are protected from damage
– the costumes can be easily found
– storage is efficient due to limited space - Adopt a system for the theatre company’s costumes
– to increase awareness and accessibility of the inventory
– to support check-out and check-in when used
– to support rental to other theatre groups
– that can continue to grow with future performances
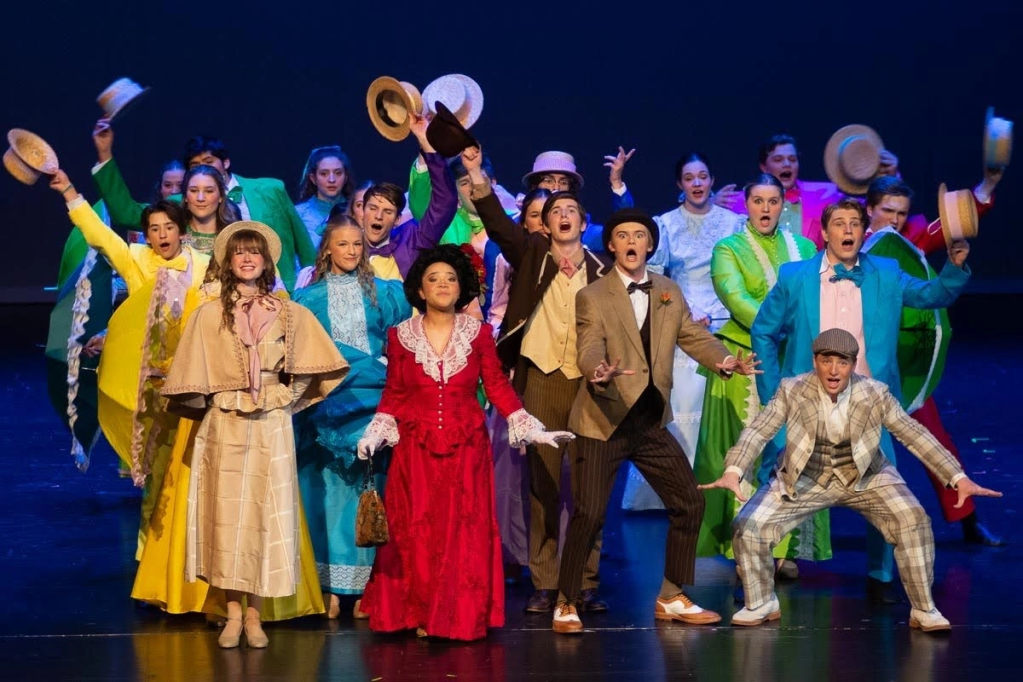
The school (Second Baptist School in Houston, TX) is a medium-sized K-12 private school with about 100 students in each year, with a cast of about fifty from the high school for the annual musical. The primary focus of the wardrobe is the high school’s performances of one or two plays in the fall and a Broadway-style musical in the Spring. The school has a strong track record in the state-level TAPPS One Act Play competition and Houston’s Tommy Tune Awards. A secondary focus is the middle school musical. Other opportunities include theatrical performances from other parts of the para-church organization. Finally, because of ten years of fantastic work by previous volunteers to source, get donated, or design and make costumes, items could be rented out to recoup some of the costs. Indeed, it is heartbreaking to see such fantastic inventory go unused.
Our situation:
– Phase 1 of the project involves about 5,000 hanging costume pieces on about 50 racks. Subsequent phases will include fabric, costume items in totes, props, and sets.
– 100ft x 50ft off-site rented warehouse for storage, shared with props, set storage, and set construction.

– No AC in the warehouse. Houston temperatures are over 100 degF in the summer. (Surprisingly, this heat does not appear to have affected the costumes).
– On the positive side, the warehouse has excellent cellphone reception, allowing fast Internet connectivity from phones or iPads. We do not have wifi.
– Two volunteer “costume moms” run the costumes for 2-3 years, though their focus is costuming the shows, not organizing the inventory. Extra moms help with shows. Students are not involved in organizing or creating the costumes.
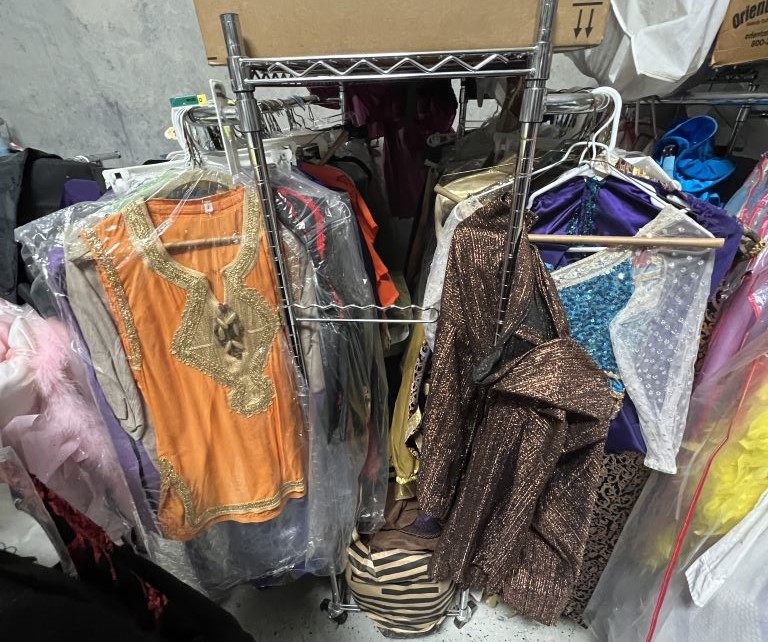
– The costumes had been organized onto racks associated with a specific period, e.g., 1940s, or clothing type, e.g., Tuxedos. Periods are associated with performed shows, e.g., the 1940s with Guys and Dolls (and others). However, without labeling, the costumes would get returned to a different rack.
– After each show, the costumes are drycleaned and placed on an appropriate rack, often with multiple hangers under the drycleaner’s plastic covering.
Our situational challenges:
– The costumes were uncovered and exposed to (1) sawdust from set construction and (2) water damage from roof leaks.
– The racks get moved around to make space for set projects in the limited space.
– Costumes get loaned out or borrowed on trust without a system to keep track.
– There is a mix of racks, and some fall over when moving. Few racks are high enough for the longest dresses, causing costumes to drag on the floor if not hung carefully.
– Some hangers are unsuitable and break, or the costume falls off it.
– None of the costumes are labeled, except for residual labels of actors’ names from previous shows.
– Some previous attempts to organize the inventory did not last with the change in “costume moms” and the growing inventory.
Tasks
1. Define the initial project scope and assess its size
The problem of organizing the costumes in a shared space with sets and props was overwhelming. Therefore, the first step was to define the first part and work out its scope. The priority was evident for us as we knew many remarkable costumes on the racks needed preservation and could be reused. I did a first count that told us it was about 5,000 hangers on about 50 racks. This included about six racks of middle school costumes, which we initially placed out-of-scope.
2. Organize costumes onto racks by category (era/clothing type)
We started with more sorting because we were unclear on how the end state would look. The two costume moms, Janet and Keesha, went through every costume, removing drycleaner plastic, sorting into categories, grouping like items together, and throwing away unusable items. Keesha’s expertise includes understanding clothing eras which was essential. This sorting also led to dividing the costumes between multiple racks when there were too many costumes for one rack. While the “maximum” per rack is about 100, it depends on the costumes, and we have nearly 200 costumes on the “vests” rack.
We made a critical decision by having “the rack” as a key identifier and were fortunate that it was already part of the organization. The defining location for a costume is its rack. The rack had a category of era or clothing type. Associated with an era or clothing type could be shows.
In parallel to organizing the racks, we labeled them. We wanted something visible and neat that would not fall off but could be changed. We went with shop ticket holders, zip-tying them onto one end of the rack. I liked the idea of them being elevated on a rod so that the label was higher than the rack and more visible, but this would get in the way of the cover. We also bought covers for each of the racks.


3. Racks
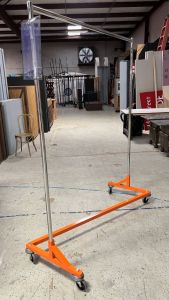
The initial sorting helped us realize how many racks we needed. While having a standard rack throughout would be great, many existing racks were OK. We had worked with the racks enough to be frustrated with some. Sturdy, heavy Z-racks are the best, with a continuous top bar for easy sliding of hangers. Some of the lighter, collapsible racks with small wheels fall over. I needed to tighten some wobbly wheels. Some racks must be tall to accommodate long dresses, so we purchased some adjustable-height racks. We had some double-wide, double-height racks, which, while compact, were much trouble, and standard rack covers do not fit. We repurposed one of these for hangers.
https://www.amazon.com/Only-Hangers-GR600-Adjustable-Commercial/dp/B007QC53E8
4. The System
We needed to identify the “system” we would use, with the desire for it to be computerized. In a previous life, I had designed and deployed business systems for factories, including warehousing software, and learned that software enables a system rather than implements one. Software would not solve our challenge. Our situation was also challenging, with no AC, no permanent staff, and frequent turnaround of volunteers.
Searching for software to give ideas of what system might work was unsuccessful. We found a few but none fit. For example:
https://www.costumeinventory.com/theatre needed a computer to host the database, which was the first showstopper. The software enabled lots of data entry for costume attributes, but we realized we would not capture any attributes, and this would make it too complicated. Describing a costume unambiguously is very difficult, especially with different people. Colors are also difficult. While measurements would be helpful, they change as costumes are altered, and measuring 5000 costumes would increase the effort by an order of magnitude. However, this could work for other groups.
https://rentaltracker.com/RTPro-Costume-Property-Drapery-Edition was another option, but it looked too advanced for us. It talked about bar codes and RFIDs which sounded great, but we had not even worked out how to label the costumes yet.
Within the church organization, we encountered a small warehouse of clothing, props, and puppets for the children’s ministry. While they did not use software, they (1) ironed on labels and (2) had photographed and printed pictures of all items and put them into a binder. This seemed more promising! We considered the ironing-on label but realized doing it for 5000 costumes would probably break us. Searching for labels that did not need ironing led to these Avery labels:
https://www.amazon.com/Avery-No-Iron-Fabric-Handwrite-40720/dp/B072T9QTKW These might have worked, but at $6 for 54 labels, it would be about $500 just for labels, and we were not sure they would work. We could have tried some, but we did not.
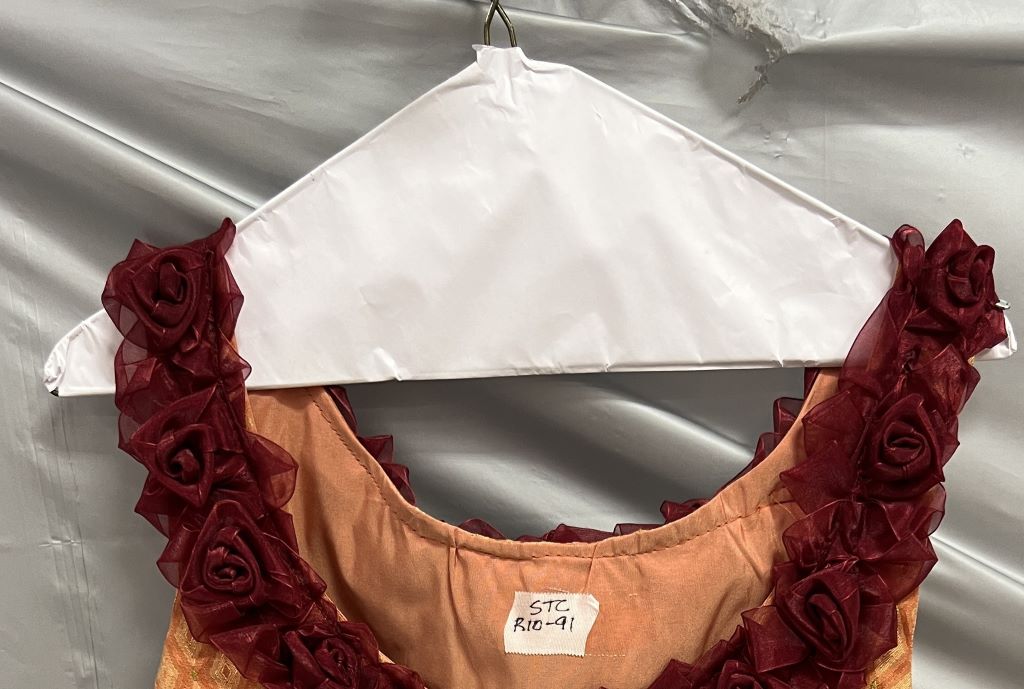
For years, the costume moms had labeled costumes for a show with the actor’s name. The label often stayed on after cleaning, especially when it was cloth surgical tape.

https://www.amazon.com/Nexcare-Durapore-Durable-Leader-Hospital/dp/B001TSJ8XC
So, we decided to go with this, writing on it with an ultra-fine sharpie:

Initial thoughts were to put just the rack number on the label (e.g., R43 for Rack 43) so we knew where to put the costume away. However, we put the rack and an item number on each label (e.g., R43-15). This was a great decision, as we had to write the labels anyway, and each costume having a unique number supports better inventory management.
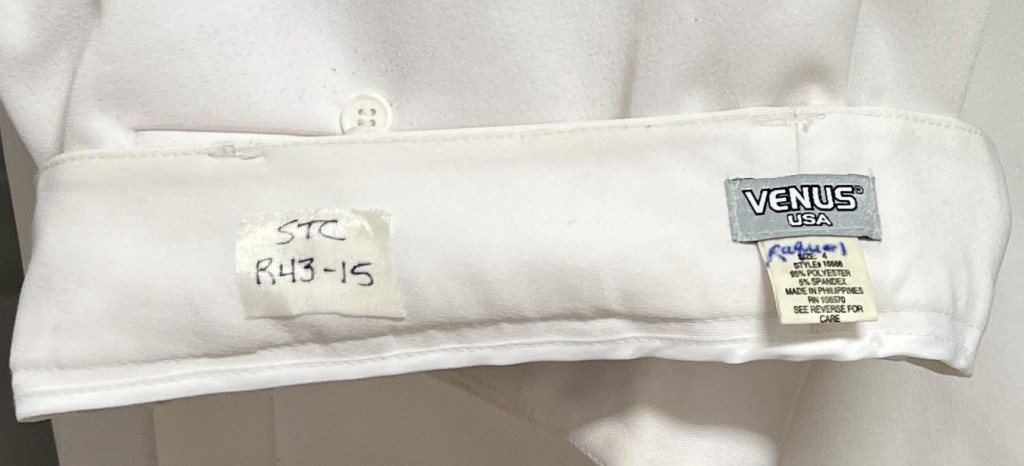
As we discovered when labeling, the fabric tape does not stick well to some materials. If needed, we can pin them on. As will be described later, by having a photograph of each item with its ID and implementing a check-out system, we should quickly identify the ID of an item being returned if it is missing its label. Also, we might need to evolve the labeling system if they fall off too easily on certain fabrics.
We also determined that a label was needed for each “costume” that might leave the warehouse so that we could keep track. For instance, twenty near-identical tuxedo jackets each needed a unique label. Sometimes, an outfit consisting of 2 or more pieces could be detached from each other, and we gave them one label as they would be used together (with a note about the number of pieces).

So now we had a system that would work. Each costume had a unique identifier, showing which rack it belonged on. However, experience from a previous loan taught has that a photo of each costume was invaluable. We had tried to organize those photos in Google Photos, which did not work well, so we wanted something else, which led to the next stage.
5. An accessible catalog/database
How do we organize about 5000 costume photos? They would be grouped by rack, with one or more racks per era/costume. A simple web page seemed the answer, that anyone could access by phone or computer. I had experience using WordPress for blogs (like this one), including manipulating many photos, so we went with that. I created a free site (https://secondtheatrecompany.wordpress.com/) limited to 1 GB of storage. I would want to downsize all of the photos anyway to make web pages load quickly, and so far, 4000 costumes have used less than 0.5 GB (After resizing – see below). WordPress is universal webpage software, so it will be easy to find other people to look after it in the future. The era/costume type and racks already defined the overall website structure. With so many photos to take, I realized we would need discipline to keep it organized, which led to the following steps:
1. Take one photo of each costume (i.e., per ID) so no editing is required.
2. After photographing several racks, transfer the photos to a computer
3. Rename the photos (in batch) to match the ID number
4. Resize the photos to 1024 pixels (thus reducing each photo from about 5 MB to 100 KB).
5. Upload to WordPress website.
I used Picasa to rename and resize the photos. It is free software that is no longer supported, so I won’t describe how I use it, but I am happy to share if anyone wants.
While digital copies are great, I also wanted to create “a book.” There is something about a hard copy. Again, I used Picasa to create “HTML sheets” with many photos on a page, though any software would do. The idea was to find the balance between seeing sufficient detail in a costume and being able to look at many costumes at once to help in a search.
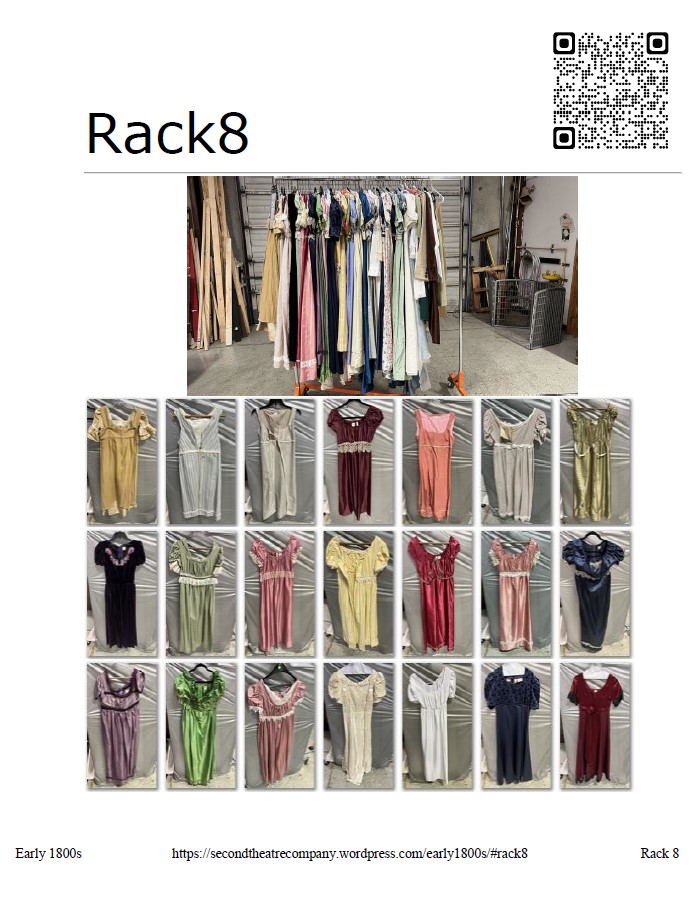
To make the book, I used clear sheet protectors https://www.amazon.com/gp/product/B085NGQ76P and Epson Matte Presentation paper https://www.amazon.com/gp/product/B00004TS2L to get as much resolution as possible into the small photos.
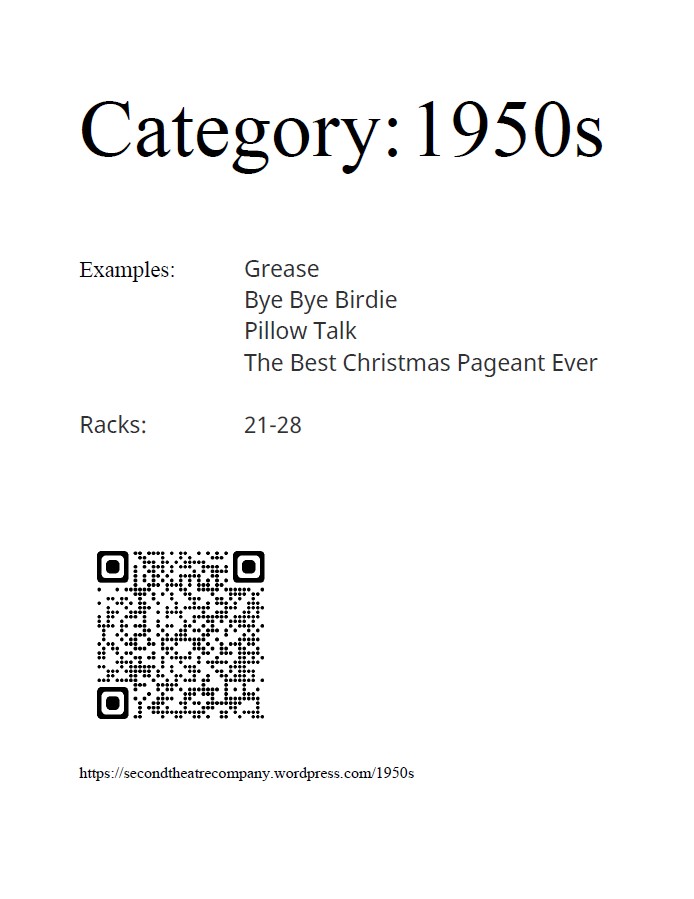
To assist with going between the hard copy and the website, I created QR Codes and put them anywhere someone might want to go from the book to the web (i.e., for each category and rack). Also, I reprinted the rack labels and included a QR code to facilitate browsing. You can create free QR codes from most browsers.
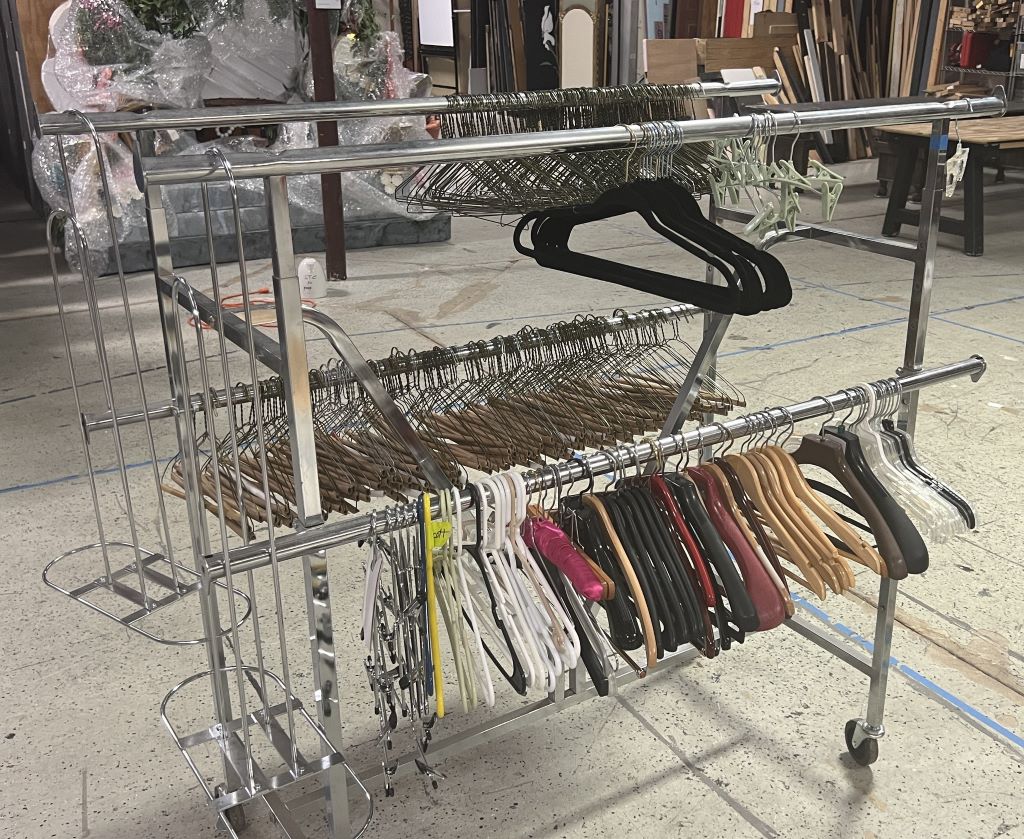
6. Hangers!
When handling so many costumes, you learn to love and hate hangers. After the last musical, I had already developed a relationship when all the hangers were thrown into multiple bags for later sorting after our last musical (recommendation: place them on racks). They are annoying to unentangle. The main issues we faced were:
1. The foam on some hangers (typically the wire ones) disintegrates over time, leaving a mess on the costume. We got rid of all of these.

2. Some cleaners put paper over the wire hangers. This can make photographing the ID label difficult, depending on the garment.
3. Plastic hangers like this degrade over time and break. Avoid them, or they will break at the worst time…

4. Heavy items require sturdy hangers. Some dresses need something to stop the garment from slipping off the hanger. Our preference is the velvet hanger.

https://www.amazon.com/Amazon-Basics-Non-Slip-Clothes-Hangers/dp/B01MAZ6ZPN.
5. Suitable skirt hangers are essential, especially for heavier garments that pull out of or break weak clips.
6. Our costumes go to the drycleaner without hangers and return on wire ones. So, we end up with a lot extra. Now that we are organized, we will work out how to re-hang costumes when they return from the drycleaners.
7. We removed all old labels from the costumes – either old name tags or laundry labels. Note that some pins can rust.
8. We arranged all of our spare hangers on a rack which helped. We tried to donate a bunch of extra hangers but could not find a home.
9. When placing the hangers on the rack, all the loops should face the same direction to prevent a sharp edge from tearing a rack cover.

We dedicated one of our less-robust racks for hangers. This is strongly recommended:
7. Execute!
Now that we had a plan, we had to do it. We found the following the most effective:
1. Janet prepared about 500 labels at home, sticking the tape onto clipboards (or similar surface) and writing the ID.

2. In the warehouse, Janet generally prepared the costume and stuck on the label, and I took a photo. I had chosen a simple backdrop for the photo in a location with good lighting. After completing a rack, I checked the photos and made sure I had everything photographed.

3. If I was progressing faster than Janet, I would help prepare costumes. Similarly, if someone else came to help us, they would help prepare costumes by removing old tags or sorting out the hangers.
4. We would limit ourselves to about 500 costumes a day, in the mornings because of the heat. This gave me time that afternoon to process all the photos, upload them to the website, and print out pages for the book. It was essential to stay on top of the photos.
5. As a rough estimate, for each rack, it took Janet about one hour to prepare the labels, it took us both about an hour to process and photograph the costumes, and then it took me one hour to process, upload, and print the photos. This was in addition to the earlier time doing initial sorting and researching the overall process.
6. Finally, we organized the completed racks neatly. With space limitations, they might be pushed together more, but even spacing facilitates the costume moms going through the inventory to pull costumes for the upcoming show and refiling returned costumes.

8. Check-in, Check-out sheet
Now that we had a system, we needed to ensure there were controls in place that involved two things. First was a check-out check-in sheet, so we know what has been taken and can facilitate refiling. While this will be essential for any future rentals, we will use it for ANY costume leaving the warehouse, including those removed by ourselves for our own shows.
The second control was to ensure that the warehouse had controlled access. The warehouse locks had not been changed in a while and copied keys were floating around. So, we are getting the locks changed. To support that, we will make ourselves available when anyone wishes to return costumes.
9. Monitor, Maintain, Add New Costumes
Even before we had finished all the racks, borrowed costumes were being returned (that we were unaware of), or there were new donations. Each show will likely lead to more costumes. So, organizing the racks continues!
10. What Might We Have Done Differently?
Having completed phase 1 and looking back, what might we have done differently? While time will tell, here are some thoughts:
a. Researched how other groups manage their wardrobes. We tried to do this but did not have much luck. I’m not sure what we would have found or whether it would have fit, but it is too late now! In summary, what we found was either (1) no system, or (2) labels securely fastened, often by stitch, to the garment.
b. Test the extra-sticky labels.
c. I have recently found some blogs about wardrobes like ours that don’t keep any garments that they can find at Goodwill, choosing to find them again when they need them. This is not something we want to do. If space was extremely limited, one might be forced to do this, but the proportion of our costumes that could be readily sourced from Goodwill is small.
d. Non-intelligent part numbers. In my professional life with business systems, I frequently had to persuade organizations to move away from “intelligent part numbers” to purely sequential ones. However, for this project, I used an “intelligent” part number by including the rack number in it. This works for now, but would fit less well if we change our racking system. For instance, we dream of a motorized system like at drycleaners. If such as system is adopted, I expect that the numbering system would need to be revisited.
11. What Next?
The high school costumes-on-hangers was phase 1. I will update this post with some feedback after our first show with this system. Next is to do the same with about six racks of middle school costumes. Then, the next priority is sorting out the storage of 50 bolts of beautiful donated fabric that is difficult to access. Then will be the 100+ totes where costume accessories, from shoes to fat suits to jewelry, are stored. The final goal is to include props and set pieces in the catalog. More fun is on its way!

Read about how it all turned out in the follow up blog from a year later: Organizing A High School Theatre’s Wardrobe – Part 2.

Peter and Janet! This is AMAZING! So organized!
LikeLiked by 1 person